In this article, we will show you how to create your queues, including adding & removing members, setting the ring type and modifying your audio files.
Queue setups can be very complex.
We recommend thoroughly reading our article on Understanding your Queue setup before creating or modifying your Queues.
Creating your Queue
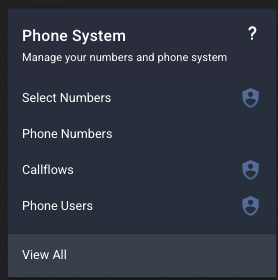
Step 1 - Under the Phone System menu, select View All then select Queues.
 .
. 
This will bring up a list of your current queues and the information for each setup.
Step 2 - Select Create Queue in the top right corner.

Every Queue requires a minimum Queue Capacity of 2 channels to be active. If you do not have enough free channels to service a new queue, you will need to purchase more.
Please submit a request to request additional capacity.
If you have existing queues, you may be able to reduce the capacity of your existing setups to free up enough capacity to create a new queue.
Step 3 - Now fill out the required information in the Queue form. For detailed information on how to set up each of these options, click here: Understanding your Queue Setup
For every new queue, you should check or set:
| Name | Description |
| Queue Name | This must be unique to each queue. Once you set the name for your queue it cannot be updated while this queue is in use on a callflow. |
| Ring Strategy |
Order Configured - Phone users will be dialled in the same order they are listed in the “Phone User(s) Assigned to Queue” box.
|
| Dialing Cycle (Seconds) |
This is the time in seconds before your queue operations will refresh. This includes:
Note - Dialling Cycle is to do with your Ring Strategy, not the queue timeout. To set a queue timeout, please click here: How to use queues in your callflows. |
| Wrap-up Time (Seconds) | This is the minimum time in seconds that your Phone Users will be left in a busy state in order to complete any call wrap up activities. When this time expires, your user will become available for any new calls coming through when the Dialling Cycle elapses. |
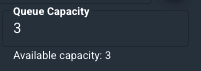
| Queue Capacity |
This is the number of callers allowed to be waiting in line to speak to an agent. If your capacity is 3, caller #4 will be sent through the Timeout option in your callflow. More info: Understanding your Queue Setup & How to use queues in your callflows |
| Announce Position |
This will announce the position of the caller in the queue. E.g. You are number 2 in the queue. The audio will play every Dialling Cycle at the frequency you set (eg: every 3 Dialling Cycles). |
| Periodic Announcement |
This option allows you to add an audio file that will play for any callers in the queue. This will play every Dialling Cycle at the frequency you set (eg: every 3 Dialling Cycles). E.g. Press 1 to leave a voicemail or keep holding. |
| Whisper |
Whispers are used to let the agent know information about the call before speaking to the customer such as the number that was called, which IVR option was selected or the marketing source of a call. You can set up a whisper on your call queue or set up a whisper override from your callflow. |
| Phone Users Available/Assigned to your queue | Use this option to add or remove users from your queue setup. |
| Delay |
This option allows you to delay certain Phone Users from joining the ring strategy for a certain amount of time. Please note - any delay on a phone user will remain in place regardless of the online status of other configured users. |
Step 4 - Once your queue information is complete, hit Save.

This call queue will now be available for use in your callflows. Please note - any queue changes or setups will take up to 15 minutes to be live.
Comments
0 comments
Please sign in to leave a comment.