To troubleshoot your Jet codes, please follow the Audit steps below. Further troubleshooting information is at the bottom of this article.
- Auditing code implemented via GTM
- Auditing code implemented via Direct Entry
- Troubleshooting your Dynamic Codes
Auditing code implemented via GTM
Getting Started
For this method, you will need to use Google Chrome to view the webpage.
Before you start:
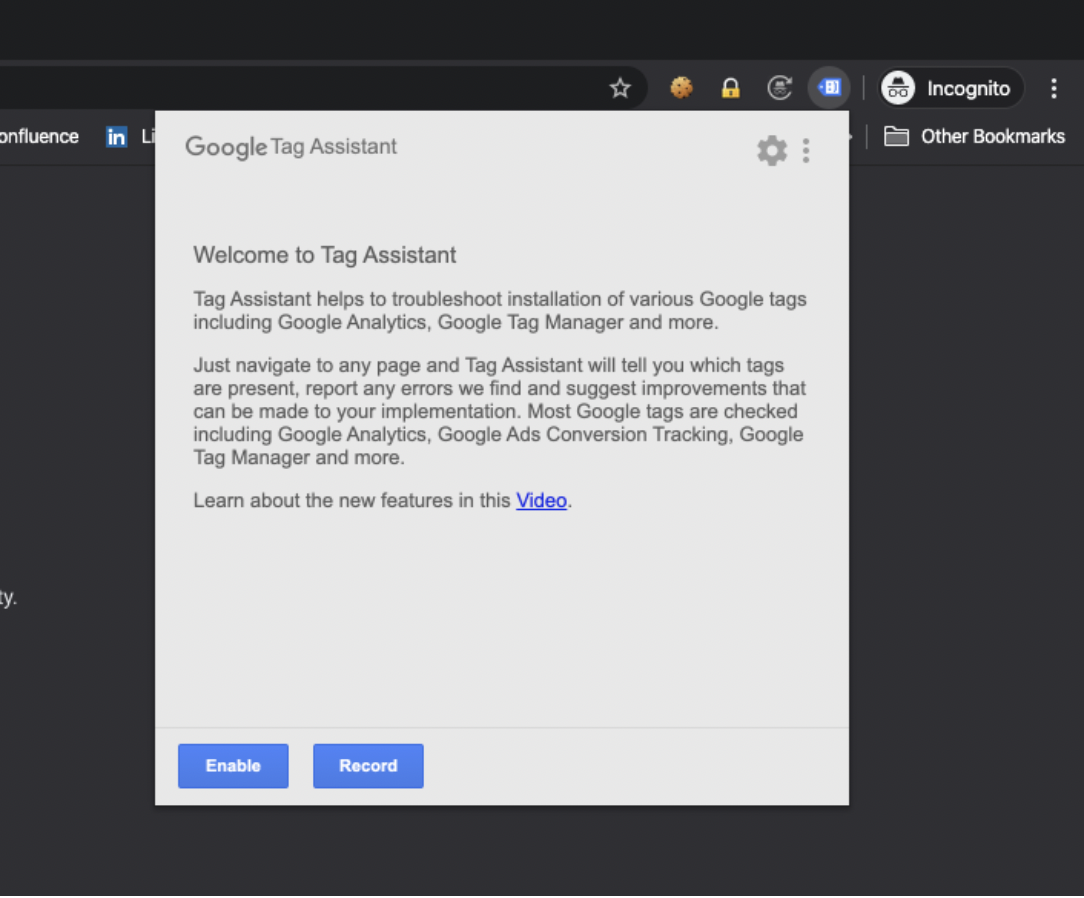
Install Google Tag Assistant extension into Chrome.
Tag Assistant helps to troubleshoot the installation of various Google tags including Google Analytics, Google Tag Manager and more.
When installed correctly, it should appear in the top right of your Chrome window, next to your profile picture.

Make sure you have the details of your Web Tracker configuration handy.
This means knowing your number replacement method (class, ID or text), and your target (class name, ID or target text).
These details can be found via the Dynamic Number Management page.
Auditing a Code Implementation
Step 1 - Open an Incognito browser window in Chrome.

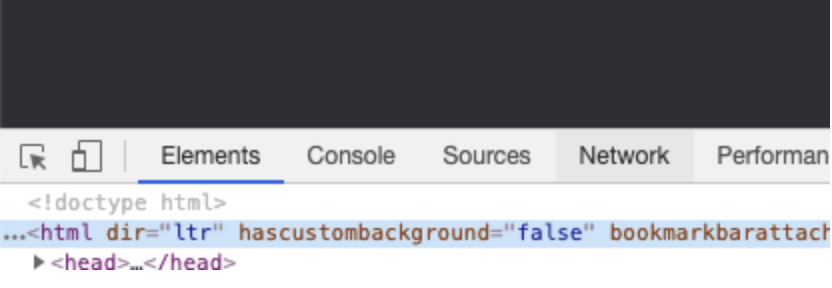
Step 2 - Right-click anywhere on the screen and click Inspect.
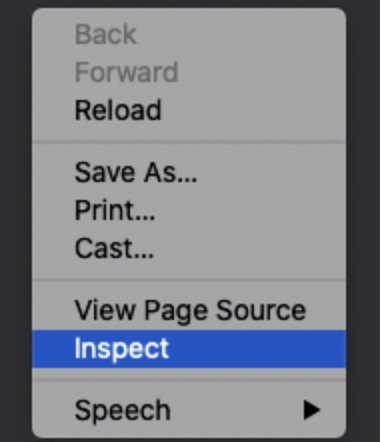
This will load up the diagnostics tab on your screen. Select the 4th tab along, called Network.
Step 3 - Click the icon for the Google Tag Assistant and select Record.
Once the recording success screen shows, you can click out of this box.
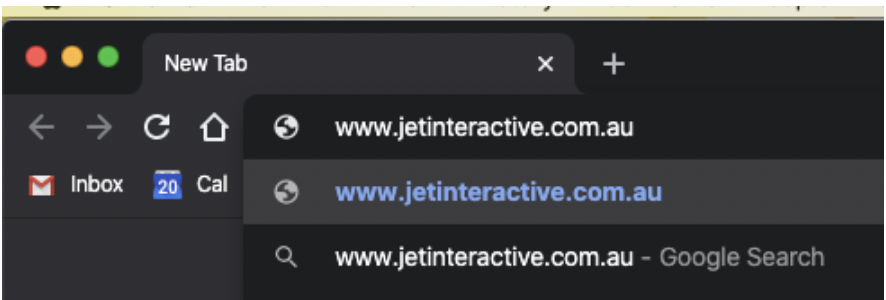
Step 4 - Type the domain you are conducting the audit on into the search bar and hit Enter.
IMPORTANT: If you are auditing a pool with filters, make sure you have a URL that will trigger them!
eg: for a cpc only filter, your domain would need to be: www.jetinteractive.com.au?utm_source=google&utm_medium=cpc
Lost? Use this handy tool to build your own custom URLs for filters and campaigns
Step 5 - In the Network tab, find the search box for filter, and type "webtracker".
What should appear is 4+ records:
- 1 x jet-webtracker.js,
- 1 x tracking code (this is WT followed by your account number)
- 2 x rest
- 2 x activity. Please note: if you are loading more that 1 pool of numbers, more records will show up depending on how many pools are being loaded. The example below has 2 pools, which = 4 activity records.
Step 6 - Click on the second entry for rest, with the initiator of jet-webtracker (not Preflight). A panel should appear with further details, click Preview.
Click on the arrows next to ‘commands’ and open up the menus until you get to ‘parameters’.
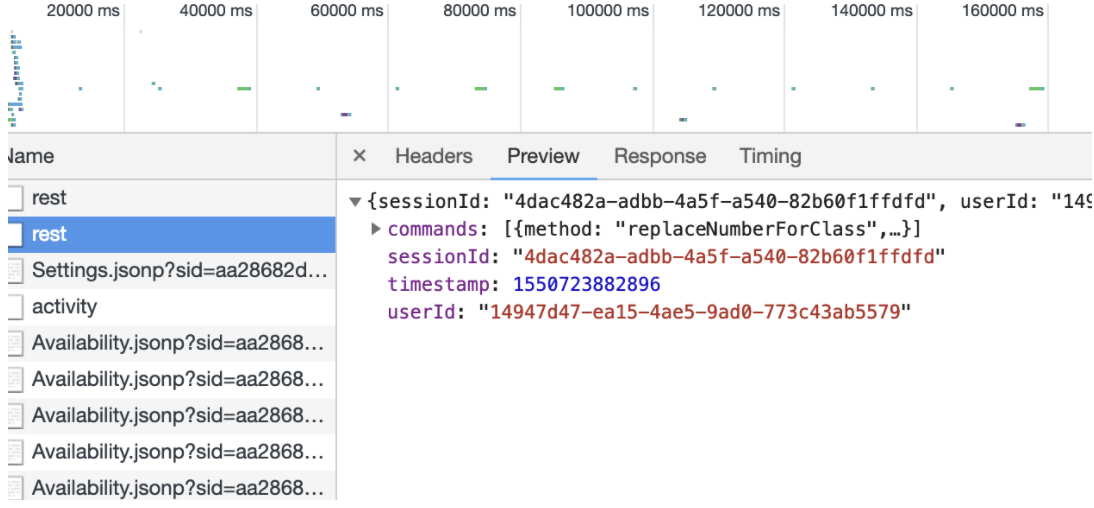
If you have multiple pools, you will have multiple records to expand
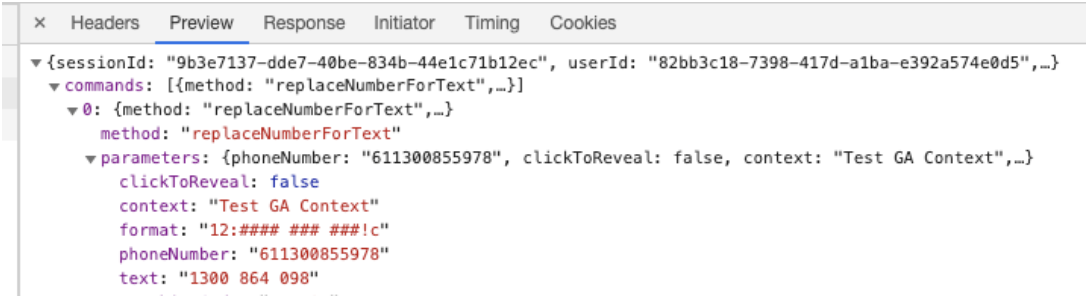
Step 7 - Check the parameter details are correct.
Check that the “phoneNumber” field matches the number that is displayed on the page.
If using replace by Text, ensure the “text” field contains the correct target as shown on your Dynamic Numbers page.
If using replace by Class, check the “elementClass” contains the correct class name as provided to you by Jet.
Step 8 - Click refresh on your page. You should see the code run and display the same number as your previous page view.
Step 9 - Click back into your Google Tag Assistant extension in your Chrome menu bar, and choose the Google Tag Manager container that was recognised on this page. Then select the URLs tab and click the URL to launch.
This action will open a new tab with a text version of your GTM container.
Step 9 - Search your tracking code in this page (WT and your account number eg: WT1000) and confirm this shows up twice within the Jet code.
Follow along from this point in the code until you see "vtp_supportDocumentWrite". This should say true.
Step 10 - Place a test call through the number displayed, and remain connected for at least 10 seconds.
Step 11 - Once you have terminated the call, check this call is in the Jet portal on the Web Session Calls Report and has the correct web data associated.
If you have a GA integration, check the event has pushed through.
If all the above steps contain the correct information, your code Audit is complete and correct!
Auditing code implemented via Direct Entry
Getting Started
For this method, you will need to use Google Chrome to view the webpage.
Before you start:
Make sure you have the details of your Web Tracker configuration handy.
This means knowing your number replacement method (class, ID or text), and your target (class name, ID or target text).
These details can be found via the Dynamic Number Management page.
Auditing a Code Implementation
Step 1 - Open an Incognito browser window in Chrome.
Step 2 - Right-click anywhere on the screen and click Inspect.
This will load up the diagnostics tab on your screen. Select the 4th tab along, called Network.
Step 3 - Type the domain you are conducting the audit on into the search bar and hit Enter.
IMPORTANT: If you are auditing a pool with filters, make sure you have a URL that will trigger them!
eg: for a cpc only filter, your domain would need to be: www.jetinteractive.com.au?utm_source=google&utm_medium=cpc
Lost? Use this handy tool to build your own custom URLs for filters and campaigns
Step 4 - In the Network tab, find the search box for filter, and type "webtracker".
What should appear is 4+ records:
- 1 x jet-webtracker.js,
- 1 x tracking code (this is WT followed by your account number)
- 2 x rest
- 2 x activity. Please note: if you are loading more that 1 pool of numbers, more records will show up depending on how many pools are being loaded. The example below has 2 pools, which = 4 activity records.
Step 5 - Click on the second entry for rest, with the initiator of jet-webtracker (not Preflight). A panel should appear with further details, click Preview.
Click on the arrows next to ‘commands’ and open up the menus until you get to ‘parameters’.
If you have multiple pools, you will have multiple records to expand
Step 6 - Check the parameter details are correct.
Check that the “phoneNumber” field matches the number that is displayed on the page.
If using replace by Text, ensure the “text” field contains the correct target as shown on your Dynamic Numbers page.
If using replace by Class, check the “elementClass” contains the correct class name as provided to you by Jet.
Step 7 - Click refresh on your page. You should see the code run and display the same number as your previous page view.
Step 8 - Right click anywhere on the page and choose View Page Source. This will load the HTML version of the page showing all codes
Step 9 - Search your tracking code on this page (WT and your account number eg: WT1000) and confirm this shows up twice within the Jet code.
This code should be the final entry in your header, and be placed just before the closing </head> tag.
Any Google Analytics codes should also be placed above the Jet codes, ideally as the first entry within your <head></head> tags.
Step 10 - Place a test call through the number displayed, and remain connected for at least 10 seconds.
Step 11 - Once you have terminated the call, check this call is in the Jet portal on the Web Session Calls Report and has the correct web data associated.
If you have a GA integration, check the event has pushed through.
If all the above steps contain the correct information, your code Audit is complete and correct!
Troubleshooting your Dynamic Codes
The most common Number Display issues are:
| Issue | Common Causes |
| Dynamic numbers do not display under any circumstances (only the default number appears) | Website implementation. Re-check your implementation to ensure that the Jet codes are inserted correctly (this is the most common cause) See the guide here |
| Dynamic numbers appear sometimes, do not always rotate |
Normal behaviour - clear browser history, cache and cookies. If you are using filters on your dynamic numbers, ensure that you navigate to the website using the correct browsing behaviour for that filter. |
| No numbers appear | Replacement / tracking code does not exist on website. |
If you are experiencing one of the above issues and your code audit is successful, please contact Jet Support with the following information:
- Website being visited - and the specific page on the website
- The browsing path leading to the website visit
- What number was displayed on the website
- Please let us know if the numbers are displayed in a click-to-reveal panel
If possible to place a call through a jet number, please also provide:
- Date & Time of call
- CLI (the phone number used to make the call)
- CLD (the number that was dialled)
- Call duration
Comments
0 comments
Please sign in to leave a comment.